Climbing training with Robbie Philips

The aim of the series, which consists of articles and videos, is to bring you the knowledge of Robbie Philips. Knowledge from ten years of professional climbing experience. Ten years that he has dedicated to learning all he can about how to get better and how to help others achieve their climbing goals.

Many of you will be aware that he gives a wide variety of ways to train climbing. Many of you will also probably be new to the sport and probably don't know what kind of training to start with to get better. We hope that the series will not only help you get better, but also make climbing more fun.

Robbie Phillips Training Series

Welcome to my brand new series of online videos and articles dedicated to the intriguing and often misunderstood world of climbing training. Throughout the series my aim is to share with you my knowledge of 10 years as a professional climber, 10 years dedicated to learning all there is about how to get better and 10 years of helping others achieve their goals in climbing.


This first episode is more of an introduction to my philosophy on training, but is integral to how you perceive climbing training as well as how you utilise the information learned in future episodes.

Many of you will already be aware of different ways to train for climbing. I am also sure there will be a large portion of you who are brand new to the sport and have no idea where to start in order to get better. My hope is that this series will help not only each category of climber out there get better, but also allow you to reap more enjoyment from the sport.


So... where do I begin?

Serie 1

Episode 1 - The theory of training

  • My Philosophy on Training

    Over the years I have experimented with a wide range of training styles in both my own climbing and with those I coach. It won't surprise many to hear that in climbing there is still very little research being done in the areas of climbing performance, although it is growing.

    In the past climbers had a much simpler approach i.e. to just go climbing was enough. These days we have seen a lot more focus on structure through the increased popularity of competition climbing where peaking for specific days in a year is of upmost priority. But what is the best approach and what actually works?

    I still believe that there is not one way that will undoubtedly be the way to train. We are each unique and therefore will not respond identically to each form of training. Climbing as a sport is so varied that when you throw in every style into the pot, how can we possibly come up with one solution that provides for everything?

    Through many years of training, I came up with my own philosophy that would help both myself and climbers I coach reap the greatest rewards from our climbing. It's not a new concept nor is it actually mine, I just say it's "my philosophy" because it's the way I approach climbing. My philosophy has several key points that I will dip in and out of throughout the series:

    Training is anything that is progressing you towards achieving your goals. When you climb, you are training as long as you have in your mind an idea of what you want the outcome to be. That can be as simple as getting to the top of the climb or using it as preparation for something else in the future.

    Be specific! I am a strong advocate of the "specificity is everything" approach to training. Climbing is such a varied activity that it's even more important to make training transferable to your activity. I would ask every climber to look at all the training they do and aim to see exactly how they can make it as specific to what they want to do as possible.

    Enjoy the process. If you're not enjoying yourself then what's the point? At the end of the day we are climbing for the love of climbing – if we've lost that somewhere along the way then we need to get it back! I always find ways to make my training fun and often this can be as simple as just changing the way you perceive "training".

    My philosophy is a combination of structure and mindset. You could call it a holistic approach to climbing training; which in my eyes makes a lot of sense considering how much body and mind as a whole functions within the climber.

    OK – so without rambling on anymore, lets begin looking at some really basic principles to help us on the way to improving as climbers.

  • The Performance Triangle

    "The Performance Triangle" is a principle in sport that says there are three main categories in which everything linked to performance resides.

    These categories are:

    • Physical (anything related to your body such as strength, power, endurance?)
    • Mental (anything related to your mind such as fear, confidence)
    • Technical (anything related to your movement on the wall or off the wall tactics)

    I have always embraced the triangle throughout my years as a climber – I look at each area and try and identify which one is holding me back at any particular time. There will of course be moments when it's not one, but several; or maybe more one than another. The most important thing is that you do acknowledge your weaknesses and what really is holding you back.

  • The Mindset to Train

    Doing the training is only half the process – the way in which you approach it from a mental standpoint is paramount to getting the most from each training session.

    The phrase "You only get what you put in" stands for more than "Do more climbing and you'll get better". If you increase the volume you won't necessarily get more benefits than if you just improve the quality of the training. Quality can mean several things, but what I am referring to here is "concentration" and "focus".

    They say that to become a master at any skill you need to have done 10,000 hours of "purposeful, focused practice". Just doing the practice isn't good enough! It has to be with 100% dedication and commitment to the activity. This is what I would ask of any climber I coach wanting to improve and it's what I ask of myself every time I go climbing!

  • How to become Self-Aware

    Saying that though, it's also important to analyse how you feel before, during and after training. Becoming aware of your energy levels is as important to getting the most out of your training as the training itself. If you are tired, then you either need to rest or adjust the training to suit. I can't ask myself to give 100% if I don't have the energy or drive anymore. You see a lot of coaches and athletes spouting the "No Pain, No Gain" approach... well this is a path that both injures and destroys motivation in climbers.

    The best way to be in my opinion is to listen to your body and avoid pushing when you're not ready... That's not to say, "don't push your limit" – you have to obviously "try hard" during sessions, but becoming self-aware of how your body is reacting to training is probably the single most important thing you will ever learn as a climber. It won't only give you a much longer, healthier career; but it will also increase your enjoyment of the sport!
    Goals bring it all together...

  • Setting a long term goal

    I am obsessed with goals! They are what give me motivation and direction to my training – without them I would be lost.

    I think it's always a good idea to have several goals in play at any one time. They should range in type with regards to time-scale, difficulty and focus. I refer to short term, medium term and long term goals:

    • Short Term – Anything from a week to a month. They usually take the form of local projects (indoors or out) and Training goals (i.e. to beat a PB).
    • Medium Term – Anything from a month to several months. They usually take the form of a much harder project, perhaps even an upcoming trip or to have achieved a higher level in one aspect of your climbing having just done a training cycle.
    • Long Term – An ultimate ambition or dream. Something which might take a year or longer to accomplish. It's a good idea to have several in the bank, some even to span years of your career so that every goal you set has this in mind in the long run!
  • There is one thing that all goals must share:"The motivation to achieve them!"

    To have motivation the goals themselves must inspire and drive you forward. They must be both inspirational and achievable! There is no point in setting yourself up for failure before you've even started. Your short-term goals should all be very achievable with the right approach. Medium-term goals can be more challenging again and long-term goals more like dreams or ambitions!
    What should I train?


    Once you've got a selection of goals that you're happy with, you now need to decide how you go about achieving them. This is obviously through your approach to training... But what do you train?

    Refer now back to the "Performance Triangle". Identify what aspects of your performance require honing or training in order to meet the level that your goal requires.

    You will have to look at what technical (T) features of your climbing may require a more specific approach. Areas such as:

    Getting more time on a certain type of rock

  • Working more precise movement e.g. footwork, body positioning

    If your goal is in traditional climbing you might want to improve your technical skills at placing gear?

    The physical (P) features of your climbing are always the easiest to train but they are no less important:

    Identify what grip types you might need to train
    How long are the climbs you are attempting? Do you need to train some endurance?
    What style of climbing? Steep, vertical, or a mix?

  • Finally the mental (M) aspects of climbing

    Are you scared of falling?
    Are you lacking confidence in a certain area of your climbing?

  • Examples

    Example 1: Bouldering Trip to Fontainbleau in 3 months (1 week trip)

    The bouldering trip is a goal in itself but you want to make sure that you have enough short term and medium term goals on the build up that allow you to get the most out of it!

    The climbs in Fontainbleau you want to do are often slabby to vertical on small edges with hard slopey mantles. The rock type is a fine-grain sandstone meaning that the friction can be really good but the footholds are often just smears on the wall where confidence in your foot placement is paramount to success.

    For this trip, you should set yourself monthly training goals such as:

    • (T) (M) Get out once a week to the local sandstone crag for Font technique preparation
    • (P) In each month work on improving your half crimp and open hand dead hang time
    • (T) Practice mantel technique on indoor boulders and outdoor boulders – if there are some local boulders with mantel top-outs that would be best
    • (P) (T) (M) Climb 5 boulders at your Flash grade
    • (P) (T) (M) Climb 3 boulders one grade above your flash
    • (P) (T) (M) Climb 2 boulders two grades above your flash
    • (P) (T) (M) Climb 1 boulder three grades above your flash

    As you can see I've set quite a few different goals for one month. Some of them are going to aid in several aspects of your climbing whilst others are more focused on one.

    To a lot of climbers who work full-time, getting out on rock is a goal in itself. For most climbers in the UK, going indoors is the easy option as it's much simpler than driving to the crag, finding partners or getting the right gear sorted and dealing with the weather. But you need to try and get out on rock at least once a week if you want to see your physical training gains being transferred onto real rock.

    I've put down some "mileage goals" – these are incentives to get a lot of climbing done and to avoid you just hanging around really hard projects that might mean you don't get a good variety of techniques honed before going away on your trip. Remember that going climbing is always the best form of training as it combines all aspects of performance; but sometimes if you spend all your time just falling off the same hard boulder you can lose confidence, stifle technique and hold back physical gains.


    Example 2: Sport Climbing Trip to Kalymnos in 6 months (2 week trip)
    Robbie Climbing in Kalymnos

    • The sport climbing trip is a goal in itself but you want to make sure that you have enough short term and medium term goals on the build up that allow you to get the most out of it!
    • The climbs in Kalymnos vary massively from long overhanging cave routes to grey vertical crimp fests – but you are psyched for climbing your first 7b redpoint and onsighting 7a in one of the big caves!
    • The holds are almost always big, there's a lot of options for hands and feet but the routes are mostly 40m long and 30 degrees overhung!


    For this trip, you should set yourself monthly training goals such as:

    • (T) (M) Get out to the local limestone sport climbing crag once a week on the build up to the trip
    • (T) Practice onsighting whilst placing quickdraws
    • (P) 2 days a week of High end Endurance training
    • (T) Practice resting skills on the wall e.g. kneebars, rockovers, dropknees
    • (P) (T) (M) Climb 5 Routes at your Onsight grade
    • (P) (T) (M) Climb 3 Routes one grade above your Onsight
    • (P) (T) (M) Climb 2 Routes two grades above your Onsight
    • (P) (T) (M) Climb 1 Route three grades above your Onsight

    There really is no end to the potential goals you can set for yourself, the key is making sure they are pushing you in the right direction to achieve what you want.
    Remember why you do it...

    So this brings me to conclude the article with one final note. As much as it's great to have goals and to train hard for them, you must always remember why you do it all in the first place... Because you love climbing!

    As I've said before throughout the article and video, all training must be transferable. Your emotions play a big role in this – if you aren't enjoying the process then you won't be trying as hard, you'll skip sessions and in the end you'll just resent going climbing... and who wants that!?!?!?

    My philosophy on climbing training only works if you're enjoying the process. If it's not enjoyable and you really resent doing it then it's not worth it in the long run.

    Set your goals, keep a positive frame of mind and love climbing!

    All film and photo credits to Finalcrux Films

    To follow Robbie on his climbing adventures visit his website or follow him on Facebook

Episode 2 - Base level endurance

Endurance is a very big subject and one that is under constant debate and scrutiny by professional coaches and sport scientists around the world. It is studied intensely in the sports of swimming, cycling and running, yet in climbing there is only a small amount of research being done.

None the less, there is growing bodies of evidence that suggest endurance is an important factor to take into consideration in climbing... namely that really obvious one where our forearms swell to the size of grapefruits and our ability to hold on disappears usually with the resulting effect of us (the climber) falling off!

So why do we get this effect when we climb for long periods of time and how do we prevent/prolong the inevitable? Well to answer that, we have to look at what "Endurance" is at a metabolic level...

Endurance is simply your body's ability to deal with oxygen depravation in the muscles when you are working them at a relatively high intensity. When you climb, your forearm muscles contract, squeezing the capillary network thereby restricting access of blood to the muscle. The blood is used to transport oxygen to the muscles, so when oxygen cannot get access via the capillary network, the body starts to act a bit differently...

  • The Pump Levels

    There are several ways a muscle can continue to function properly:

    With Oxygen (Aerobic)
    Without Oxygen (Anaerobic)

    To say it's one or the other would be wrong; in actual fact it's a mix of the two. However at any one time there is usually one more dominant than the other.

    The main physiological effect that differentiates both energy systems is something called "The Pump". This is an effect of anaerobic respiration where due to their being less oxygen present in the muscles; lactate, hydrogen ions and blood pressure build up causing fatigue and eventually muscle failure.

    "Pump" is a very noticeable feeling that every climber will be aware of.

    The Pump Levels

    One way of identifying which zone you are working in with regards the type of endurance is through "Pump Levels". These refer to how "pumped" you are at any given time on a climb. I find this an effective way of measuring for those of us without a team of dedicated sports scientists taking blood samples after every climb...

    The "Pump Levels" are more of a state of "feel" than anything else. Just like I said in Episode 1; being self-aware is one of the most important lessons you will learn in your life as a climber and this is a prime example of it in action.
    Aerobic Climbing Training

    Level 1 – Easy Climbing, No Pump

    Level 2 – Moderate, Slight Pump

    Level 3 – Comfortably Climbing but pumped

    Level 4 – Intense Climbing, Really Pumped! Have to fight for it!

    Level 5 – PUMP MAX!!! This is when you fall off

  • Types of training

    Aerobic Training

    Remember that Aerobic is with oxygen; so that means you shouldn't feel much pump if any whilst training.

    The benefits of aerobic training are many! You can look forward to:

    Increased blood capillary density allowing easier access to the muscles which in turn improves anaerobic endurance

    Improved recovery – Aerobic training is a great way of increasing the blood flow without stimulating more tearing of the muscle fibres. Instead you will be encouraging the flow of nutrients to the forearms improving recovery

    More energy – Aerobic training has also been known to allow muscles to store more energy in the form of fats and carbohydrates

    Aerobic training is probably the easiest to train; I do this in several ways:


    Continuous Climbing (Bouldering Wall)

    Time: 10-30 minutes

    Intensity: Level 1-2 Pump

    Description: Find a nice easy angled section of wall (vertical to slightly overhung) with a good selection of positive holds and jugs to rest on. Your aim is to climb continuously maintaining that Level 1 pump. Do not allow yourself to exceed this, just try and keep a nice steady flow and if you feel like the intensity is rising; stop on a jug and shakeout.


    Continuous Climbing (Lead/Top Rope Wall)

    Time: 20-30 minutes

    Intensity: Level 1-2 Pump

    Description: You will need a patient belayer for this one! Your aim is to lap 3-6 climbs at the wall where your only rest is the time taken for you to lower to the ground and start climbing again. Don't exceed Level 1 pump – if you feel the intensity rising, grab any big jug on the wall regardless of colour and rest there. It's good not to sit on the rope during this exercise as finding rests on the wall teaches good resting techniques.


    High End Anaerobic Endurance

    So we've discussed what anaerobic endurance is, however there are different levels to which it can be trained. I like to refer to them simply as High-End and Low-End Anaerobic Endurance. In this episode I am only going to look at High-end, but don't you worry, episode 4 will reveal my take on training low-end Anaerobic endurance as well.

    The main differences in both types are the level of intensity and volume of moves. For High-end anaerobic endurance we want to be working in the region of Level 3 intensity for around 90+ moves (ideally a lot more).

    This type of anaerobic endurance is excellent training for sport climbing and trad routes were you would be spending a long time on the wall.

    So how would you approach training this? Well there are a number of ways:


    Route Laps (Lead Wall/Top Rope Wall)

    Time: 15-30 minutes

    Intensity: Level 3 Pump

    Description: Your aim is to complete anywhere from 3-6 climbs maintaining a level 3 pump. The first climb is usually a bit harder than the subsequent climbs as that will spike the pump and from thereon in you will have to try and maintain it. Important to remember; this is training so don't feel obliged to push through if your getting really boxed! Just grab another colour of hold and shake out.

    Aim to rest around 1 and 2 minutes between each rep – this is usually the time taken to untie, pull the rope and re-tie for you next lap.

    You should be aiming to complete a total of 3-4 sets in a single session, each set separated by quality rest that brings you back to full-recovery, but by the third set I'm sure no amount of rest will ever feel like "full" recovery!


    Circuits (Bouldering Wall)
    Boulder Circuit Training

    Time: 10-20 minutes

    Intensity: Level 3 Pump

    Description: Your aim is to complete anywhere from 3-6 circuits maintaining that level 3 pump. You can do this in a number of ways. I find it easiest to have a pre-built circuit that you've memorized which you will try and repeat a maximum of 6 times. Use pre-set jugs on the wall at various points to shake out with in order to maintain that level 3 pump otherwise it might be hard to maintain the level.

    The resting time between each rep is the same as for routes but with circuits you can be stricter. As you progress with the laps on a week by week basis, try lowering the rest time from say 2 minutes to 1.5, working down eventually to 30 seconds at max - by that time you should probably build a harder circuit!

    Building the right circuit can be challenging and there are definitely ways to make it easier. This is something I would like to cover in more detail in future episodes but for now, here are a few tips:

    Linking Exisiting Boulders – Probably the simplest way is to just link exisiting boulder problems on the wall. Climb up something mid-grade and down-climb something easier then back up another mid-grade problem.

    Linking Made-Up Boulders – A bit more advanced would be to make your own boulders up and then to link them together. This at least chunks the circuit into bit-size pieces so you can be more specific in each section as to what style of climbing you may want to focus on. The only issue with this is it's harder to remember, as every hold will be a different colour. To make it slightly easier, just make the upwards climbing different and then choose an existing easier down-climb.

  • The Transfer

    Indoor to Outdoor Training Transfer

    As I have mentioned numerous times already and will be continuing to discuss throughout the series, the transfer of "Training" into actual climbing is of upmost importance! What I have found throughout my years of training is that the more specific to real climbing you make your training, the more you gain for your actual climbing!

    I would say high-end anaerobic training is done best on a lead/top rope wall where you lap actual routes. The reason for this is you are doing upwards climbing, which is (most of the time) what you do when you are climbing a sport/trad climb outdoors or even another indoor route. Not only this but you will be simulating techniques required when doing routes such as clipping, resting and changing your pace.

    When you build a circuit on a bouldering wall it doesn't take long before you have it so wired that you could climb it quickly without stopping. There is no need to clip, no need to rest and the movement becomes second nature.

    Maybe you can't be as specific with your climbing if you are lapping pre-set routes on a lead/top rope wall, but I don't think it always matters so much. Also, if you are lapping routes at the wall, it's much easier to vary the climbs because all you need to do is choose another climb to lap... It's hard to do this on a bouldering wall, as you will have to make up another circuit. And even if you do have pre-set coloured circuits, it's unlikely that there will be several at the exact level you want.

    If however there is no way you can fit in a route laps session (be that because you don't have the time or a willing partner); there are a few ways of approaching circuits that can make the transfer a bit better:

    Slow down – Don't rush through each circuit lap; climb at a normal pace even if you know the climb off by heart! This is training and not a speed competition!

    Mock Clipping – An old school competition training tactic but I still like to incorporate this into some of my circuit sessions. At certain holds along the circuit you can pretend to clip – do this by taking around 5 seconds on a hold to fake grabbing a rope and lifting it high to reach a fake clip. You can be even more professional if you have pre-placed clips on the wall but unless it's your own woody I doubt you will have that facility available.


    The last point I am going to make is yet another that I will re-visit later on in the series but something that is important to note for this endurance-training episode. A lot of climbing training enthusiasts are against shaking out and resting whilst doing laps and circuits; I however am all for including them as long as they aren't milk it jugs or no hands rests. I feel the skills of learning how to relax and rest on a route whilst pumped are actually really advantageous in real-life climbing scenarios. I would say that as far as my abilities as a climber go, resting is probably my strongest skill and I believe that I developed it to high level from this sort of training. From forcing rests out of marginal holds whilst pumped I learned how to relax in awkward positions, improve my breathing, regain composure and even improve my hip flexibility on the wall by forcing myself to get as much weight over my feet as possible!


    Endurance is obviously an important aspect of climbing which has its place in every discipline of the sport from bouldering to big walling! We will re-visit endurance in later episodes, but to conclude on this one I'll just make one last reminder that as much as endurance has a physiological effect on the body; the technique of endurance such as resting, pace, breathing and controlling your mindset are as key to how much you can benefit from endurance training as any physiological gains!


    All film and photo credits to Finalcrux Films

    To follow Robbie on his climbing adventures visit his website or follow him on Facebook

Episode 3 - Strength Basics

Strength is simply your muscles ability to contract giving of a maximal level of output force. But what does this mean to us as climbers? Climbing as you know is a fairly upper-body driven activity with most of the major muscular work being done in the arms, shoulders, back and torso. This gives a clearly defining coverage of where strength really matters which has over the years led to several distinct areas of strength training:

  • Finger Strength
  • Lock Off Ability
  • Shoulder Stability
  • Core Strength

So Strength is obviously a wide subject area and encompasses many different parts of your body, but essentially it means the same thing across the spectrum. We will look into the specifics of each area in time but for now lets just focus on what it means to train strength?

  • The key to strength training

    If Strength is the maximal contraction of a muscle, then to train it all we need to do is replicate that contraction. The key to strength training is in three things:

    1 - Intensity
     

    To get the muscle adaptation through training it's important to get the right intensity. This isn't difficult with strength work as the intensity is essentially your maximum ability.

    Consider training in a gym; strength work would be doing 1-5 reps where you are just managing to complete the set. In a climbing scenario an example could be a 1-5 move boulder problem at your limit!


    2 - Volume

    Something that is harder to get right is the amount of volume you do in a session. When training strength you should be aiming for short sessions of lower volume when compared to an endurance session for example.

    Strength sessions should last no longer than 2 hours maximum! The reason for this is that strength adaptations come best when you are training at your max and it's impossible to train at your max for 2 hours solid so realistically any longer than this and you risk over-training with potential injury as a result!

    3 - Resting

    This is the big bad word that every climber hates!!! Resting is the MOST important element of training no matter what you are doing; but in strength training it is essential! After a hard strength training session take a minimum of 1 days rest but if you want the greatest benefits, take 2 days rest!

    My biggest gains in strength work came from 1 day on, 2 days off – the day after strength training I might do some antagonistic work in the gym, core or aerobic training. If I did go climbing I would only be doing Aerobic training i.e. very easy continuous climbing and nothing intense!

  • Power and Strength: Is there a difference?

    There is a common misconception that "Power" and "Strength" are the same thing. This is in fact not true:

    Strength is your muscles ability to exert a set amount of force e.g. your ability to hold a very bad hold.

    Power is your muscles ability to exert a set amount of force in a short amount of time with movement! An example of this would be a dynamic move.

    When it comes down to it, Power cannot exist without strength – If you can't hold onto the hold how are you going to move of it? This is summed up really well in this equation:

    Power = Strength x Speed

    That's not to say Power is not important; without power how would you be able to initiate dynamic moves? It is important however to understand that there is a difference and that when it comes to training for climbing, we need to know exactly what we are focusing on at any given time.
    Bouldering for Strength!

  • Training on Boulders

    Physical Training on Boulders

    The best training for climbing is climbing! There are a myriad of training aids and devices nowadays that are said to develop unfound levels of strength and endurance like never before! Only one problem; what use are they if you can't apply it? That's not to say they aren't useful; but I feel there is far too much focus being put on Fingerboards, Campus boards, Gymnastic Rings and the like as an all encompassing way of getting strong for climbing when in actual fact they are only supplementary aids and should be left as that.

    Without a doubt Bouldering is the best means of getting good transferable strength gains for your climbing. This can be done in a number of way using various exercises and strategies to focus on "Strength" over "Power" but also to maximize effectiveness in the transfer to your climbing.

    Boulder Projects (30 mins to 1.5 hours)

    "Boulder Projects" are what they say on the tin – hard boulder problems that you need to repeatedly try and work hard on until you can finally climb them. This is arguably the best way to train for transferable strength because you're practicing real skills at the same time as well as it being an all-encompassing physical exercise.

    When doing boulder projects it's important to pin down exactly what you want to train. For example, doing dynos and big moves between slopers is a very power orientated style of boulder problem; whereas to train strength more specifically it would be better to focus on smaller more intense movements with worse hand holds.

    If I was doing a boulder project session, I would focus on between 2 and 5 boulder problems in the entire session aiming to spend 20-30 minutes on each one. Bear in mind, to have good gains on a project boulder you need to allow for adequate rest between attempts and working goes where you don't start the boulder from the bottom.

    Example Session:

    Boulder 1 (30 minutes) – 10 move problem on a 45 degree wall with small but positive edges, smaller movements and slopey feet.

    This will develop good static upper body strength, finger strength and core body tension for steep walls.

    Boulder 2 (15 minutes) – 6 move problem on a 30 degree wall with big slopers, shoulder compression moves and mostly feet to hand moves with heel hooks.

    This will develop good sloper strength, shoulder stability and core strength when it comes to compression style movements.

    Boulder 3 (15 minutes) – 8 move problem on a vertical wall with small slopey edges, bad feet and some balancy moves

    This will develop good finger strength but more so an awareness of balance and weight through your feet

    Boulder 4 (15 minutes) – 12 move problem on a roof with big positive round holds into a mantle onto a vertical section on slopey crimps

    This will develop a powerful style, amazing body tension for overhangs and practice technical mantles as well as the transition from bigger holds in roofs to smaller ones on a vertical plain. To a certain degree this is also a power endurance problem!

    Boulder 5 (15 minutes) – 7 move problem on a 45 degree wall with positive 2 finger pockets for hands using the same pockets for feet also

    This will develop good open hand and two-finger pocket strength as well as teaching precision in technique and good core tension.


    Slow-mo Bouldering + 3 Second Locks
    Aerobic Climbing Training

    If you want to isolate strength more specifically, then why not try and climb a set of boulders a little bit below the intensity of a "Boulder Projetct" at a slower speed. This will isolate static contraction from lock offs to shoulder tension and finger strength!

    Even better again would be to do "3 Second Locks". This exercise is a good one for lock of strength and technique, the reason being because:

    1. You have to lock off and hover your moving hand above the next hand hold for 3 seconds
    2. You can only do this if you have a good body position i.e. it teaches good technique!

    I think it's important to not make these too easy! If they are then you will be able to lock of from any position. If they are at just the right level however it can be difficult to find the right body position, which certainly adds more interest to the exercise.


    Mileage Bouldering

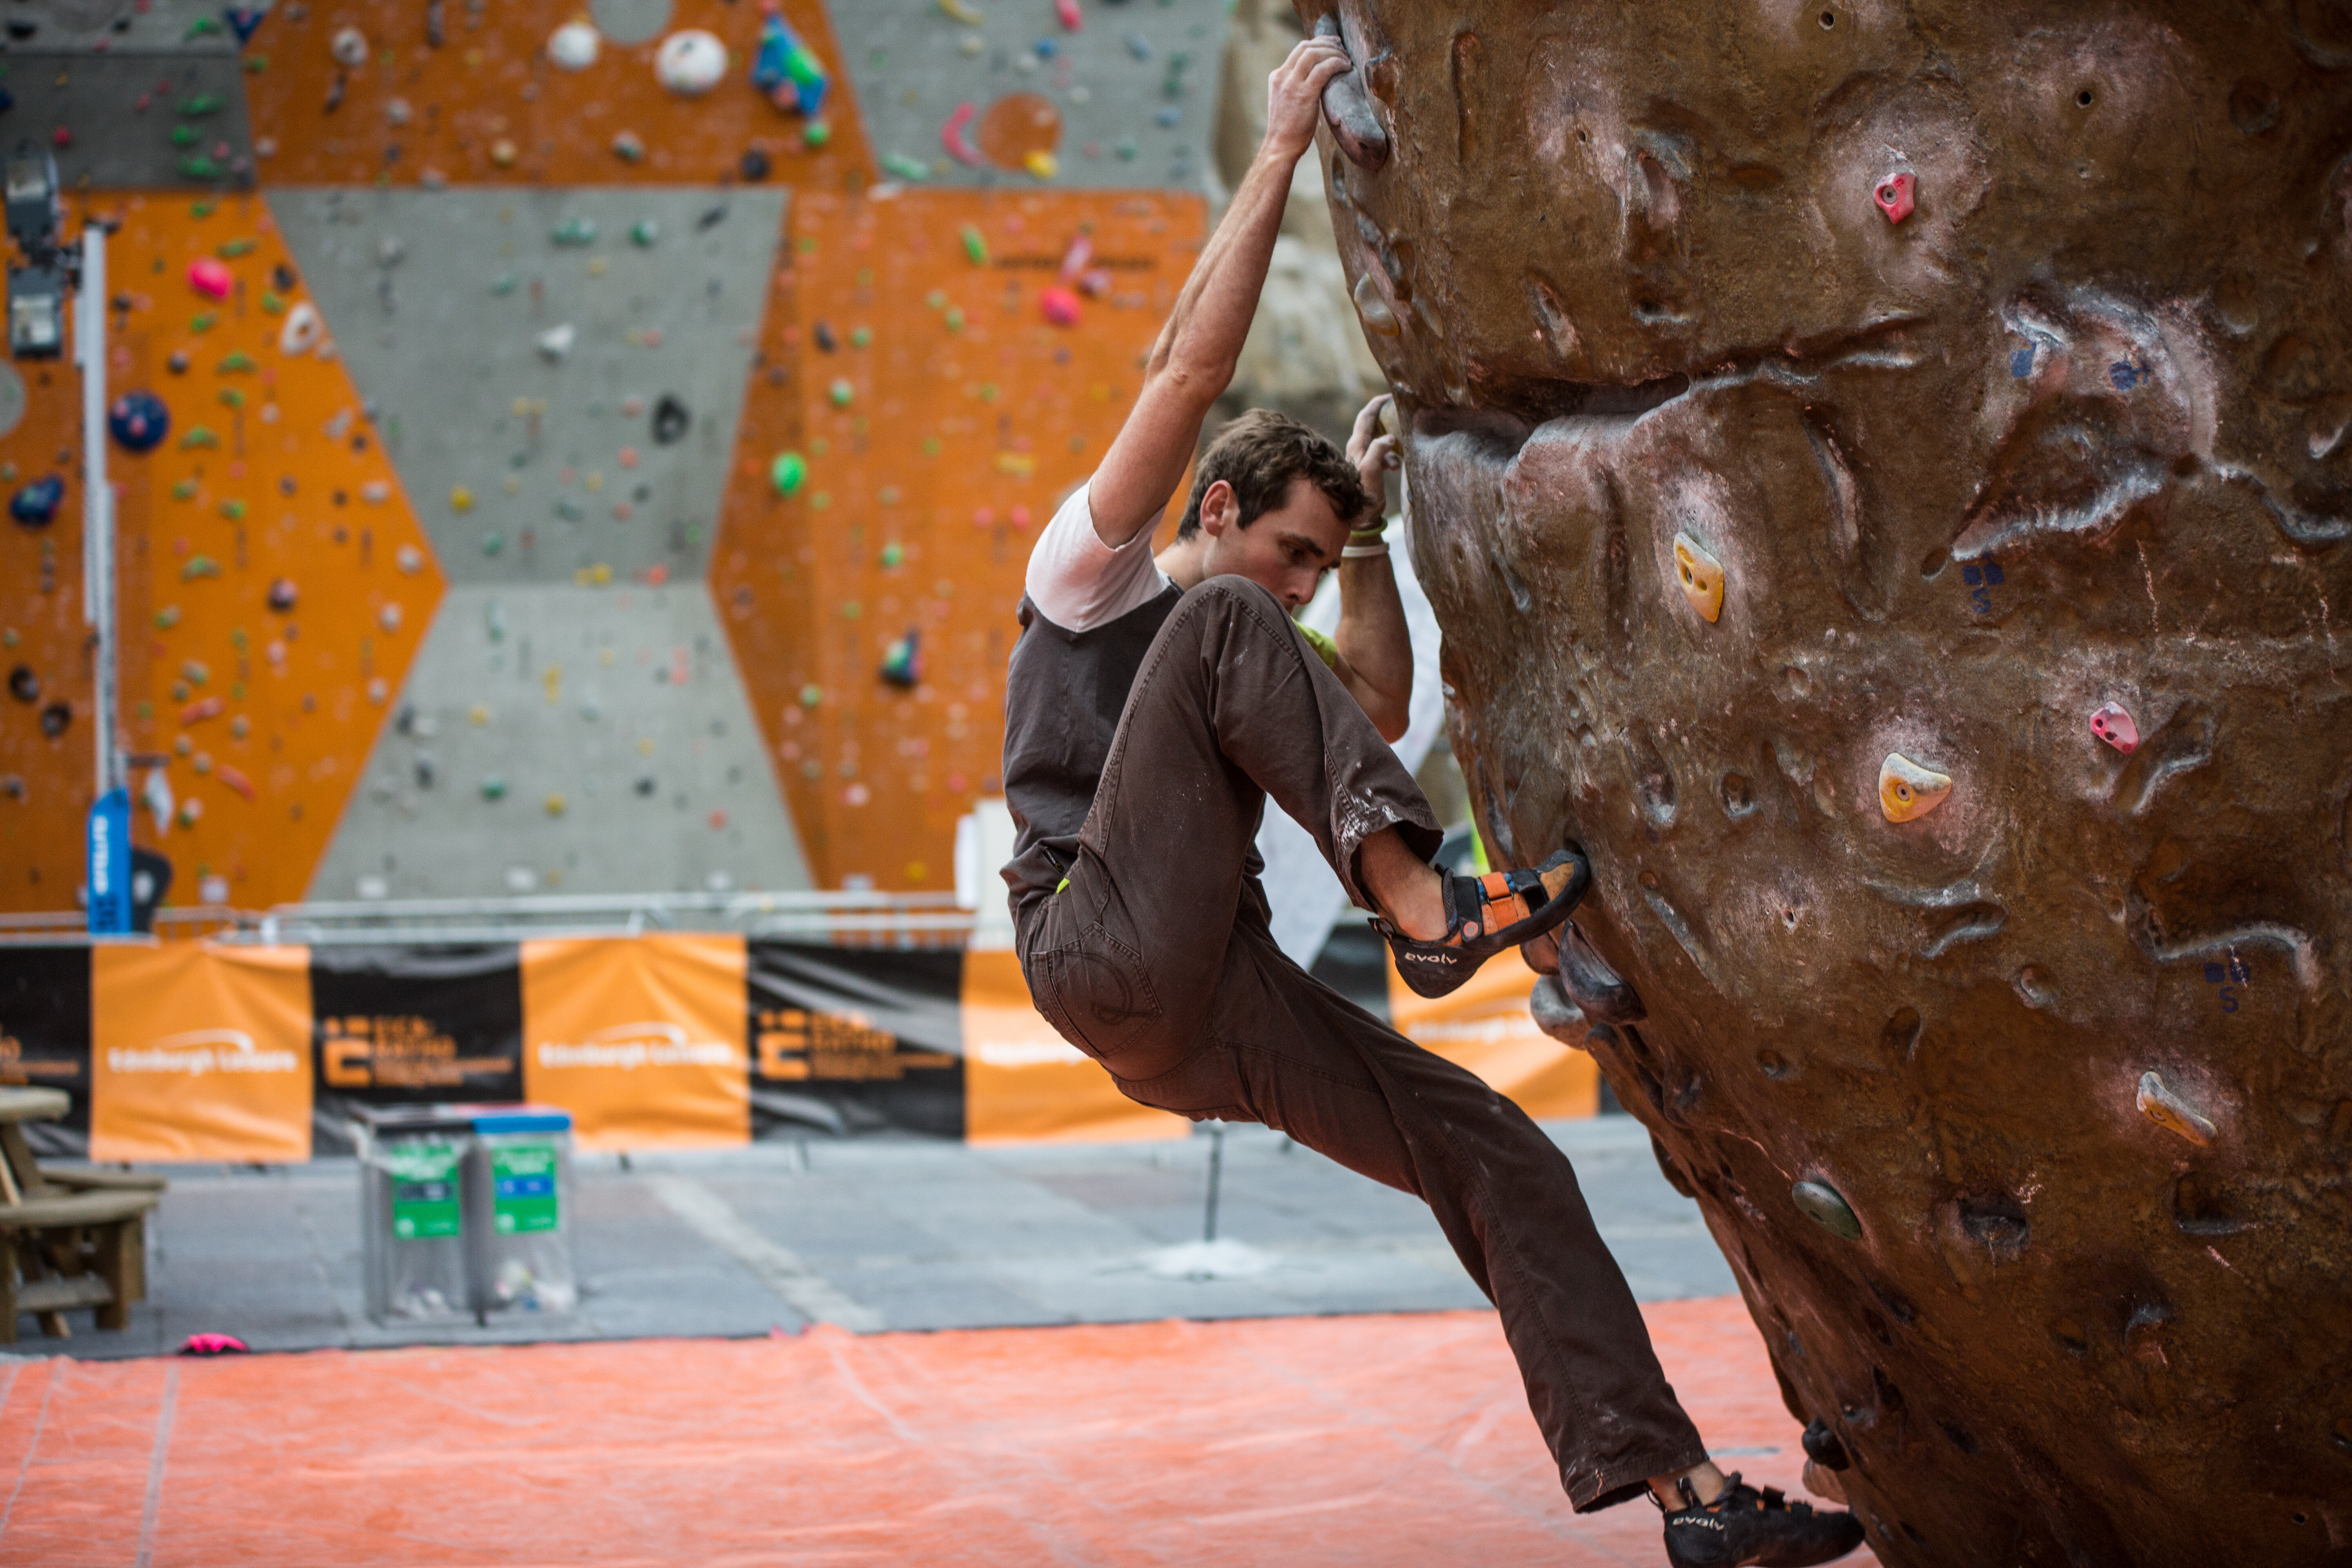
    As much as it's important to climb at your limit to train strength, conditioning is just as important! Including a stint of mileage bouldering where you climb anything from 10-30 boulders that are all within your limit is a good way to train technique and consolidate some of that boulder strength with lighter strength based movements.

    Even though it's not at your limit, it shouldn't be easy! I'm talking anywhere between comfortable onsight level boulders to the 3-5 attempts level of intensity. Those boulders should be mixed in with easier ones so you don't tire yourself out by trying too many harder boulders in a row.
  • Climbing Specific Exercises for Strength!

    So whilst I have been pushing the Bouldering front so far, there are also other exercises you can do to help develop strength specific to climbing. These are of course using training aids such as fingerboards, campus boards and gymnastics rings. All of these tools are very much a supplementary activity and should not be seen as an all-encompassing exercise to replace real climbing!

    I am only going to cover Fingerboards in this article at a very basic level and we will cover more in future episodes as well as fingerboards in greater detail.


    Fingerboards

    Finger Board Training

    Fingerboards are a really versatile piece of kit found in pretty much any climbing wall (and home these days).

    There is a variety of different exercises ideal for the fingerboard that covers a range of different tpyes of strength:

    Deadhangs – The simple act of hanging from the board. Choose a grip and aim to hang for a maximum of 10 seconds for strength training. Try and find a grip where 10 seconds is just possible and complete 6 sets with 1-2 minutes rest in between each set – Trains: Fingerstrength + Shoulder Stability

    Pull Ups – Everyone knows what a pull up is. This exercise combines fingers, shoulders and arms for a much wider ranged exercise. Aim for 6 sets of between 1 and 6 repetitions if you want to remain within the realms of strength training – Trains: Fingerstrength + Shoulder Stability + Lock Off Strength + Core Strength

    Repeaters – A slightly more power endurance orientated exercise but a good intro for beginner fingerboarders. Hang for 7 seconds, rest for 3 seconds and repeat this for a maximum of 7 times! Aim for 6 sets where every 2 sets you change the grip type – Trains: Fingerstrength + Shoulder Stability + Power Endurance

    Encores – These are just repeaters but instead of holding the same hanging position, you change the degree of lock on your arm each rep to challenge your lock off strength as well as your fingers – Trains: Fingerstrength + Shoulder Stability + Lock Off Strength + Core Strength + Power Endurance

    These days there are so many different types of fingerboard on the market! My preference is for the Beastmaker (1000 + 2000 series) as they are made from wood, friendly to the skin and have an ergonomic design meaning you are less likely to get an injury.

    I also travel a lot and sometimes don't have access to a decent training facility, which is where Awesome Woodys portable fingerboards have been a lifesaver! These are super lightweight designed with functionality and portability as the key features!

    Note: Important to always remember – Fingerboarding is a supplement! It does not train technique or movement skills and therefore should be seen as a tool to hone your strength, nothing more! Fingerboards have been the "make" and "break" of many a climber; the trick is not getting too drawn into the initial gains you will make; leave the real psyche for the climbing!

  • Conclusion

    Strength is static contractions; the goal when training strength is to focus on slower movements using less momentum. At the same time however, when we are climbing we don't want to dictate too much of a non-efficient style in order to train strength solely.

    What I would recommend then is by making your strength training sessions a mish mash of bouldering at your limit, mileage and supplementary exercises such as "3 second locks" and fingerboarding to target that raw static strength more directly. That way we get a good balance of "specific" training and technical based exercises that help our transfer of physical gains into movement skills.

    Strength is the most intensive of all the physical areas of training which is why it requires the most rest to benefit from the adaptation. I would recommend a minimum of 1 days rest in between sessions with a preferred 2 days rest for ultimate recovery time.

    Hope you enjoyed this article but that's enough reading about training for one day... get off the computer and go do some climbing!


    All film and photo credits to Finalcrux Films

    To follow Robbie on his climbing adventures visit his website or follow him on Facebook

Episode 4 -  Introducing Power Endurance

You're on the wall, your forearms have a light forearm pump already and you can't spot a rest ahead so you keep powering on up the face. The holds are small but you're still managing to stay focussed and fight through the building feeling of tiredness in your arms. You manage to get a light shake on some small edges; you continue to battle on, the intensity is rising but you keep going... All of a sudden you lose power, your hands are relaxing their grip as if the muscles in your forearm have lost all ability to contract anymore and you make one last ditch effort to grab the next hold... your fingers latch around the next hold but despite the in-cut profile of the edge, they seem to just slide off as if it was lathered in grease!

Power Endurance is mostly your ability to sustain muscular contractions at a medium to high intensity with limited rest. The feeling is quite unlike that of a typical endurance burn where you can rest or shakeout mid-climb as the intensity of climbing is at a level where this is impossible. The feeling upon reaching the most intensive bout of a power endurance focussed exercise is that of complete muscular failure without much sensation of a forearm burn akin to high-end endurance training. Instead it has often been described as a feeling of a "lack of power" upon failing or reaching the end of a set.

I have always struggled with training power endurance; sometimes I feel as if you're either born with copious amounts of it or a complete lack of it! But just like everything else it is completely trainable and is a vital energy system to hone if you want to get the most out of your climbing!

  • How to train Power Endurance

    The training of Power Endurance is mostly trying to replicate the same feeling of exertion you get close to the limits of working this energy system. You can do this in a number of ways:

    Climbing Hard Routes

    By actually trying hard routes at or close to your limit you will be working a level of power endurance. I find this is a really effective session at getting both the intensity right as well as the transferability to actual climbing which is as always the main focus of my training regimes.

    In a session you should aim to climb 6 x hard routes at or close to your limit. An example for a climber onsighting comfortably at 6c would be:

    • 6c Onsight Attempt
    • 6c+ Onsight Attempt
    • 7a Redpoint Attempt
    • 7a Redpoint Attempt
    • 7a+ Practice Redpoint
    • 6c+ Repeat

    This session allows for a variety of different situations in which Power Endurance will be being trained but also effectively practising technical and tactical performance. Although this is a great session to run, three days a week of this would not be the best use of your time for focussed physical preparation and you should mix it up with some more intensive Power Endurance training sessions such as what I am next going to show you.

    Doing Circuits

    You can target power endurance more specifically by making up circuits on a bouldering wall. These you can tailor to suit a specific type of hold or movement that you may find you're weak on. I find having a few different circuits at varying degrees of length and style is the best way to make the greatest gains.

    Build 3 x Circuits:

    • 20-25 Moves
    • 30-35 Moves
    • 40-45 Moves

    Make sure each of them has a different style so you're varying technique and grip types. Your aim now is to repeat each circuit 2-3 times allowing for almost full recovery between each attempt. If you find that you can complete each circuit but are maxing out on or around the final moves then you have found a good level; but if you are failing on the circuit every time then it's probably too hard.

    Boulder Reps

    These are definitely my favourite power endurance exercise as they require little preparation and brutalise both body and mind!

    • Find a boulder problem of around 8-12 moves in length
    • The level must be at or around your regular onsight boulder grade
    • Climb the boulder without rest for between 3 and 5 repetitions


    This is one set and I would be aiming for 3 sets if accompanied with a different exercise or up to 6 sets if on their own.

    The benefits of boulder reps are that they don't require a lot of preparation. The negatives are the fact that you're repeating the same moves over and over again. This means you become used to the sequence and therefore better at repeating, however it also means you may be susceptible to repetitive strain injury if you don't mix things up. I would recommend each problem in a session being a different one and not repeating the same set for longer than a 3 week cycle if you're doing 1 or 2 sessions a week.

    Campus Board Power Endurance

    The most physically effective exercise for pure power endurance is on a campus board - you will need somewhere to put your feet (it's not a footless exercise). This exercise is the most intensive out of the set mentioned in this article as it targets the forearms specifically without any other factor such as technique having any bearing on success or failure.

    • Find a campus board with footholds (or stool if there are none)
    • Complete the sequence – Rung 1 (Matched), Rung 3, Match, Rung 2, Rung 1, Match
    • Aim to complete 6 to 10 repetitions of this sequence for a total of 30-50 moves

    Aim for 3 sets using 4 fingers (half crimp) and 2 sets using 3 fingers (open hand). I find that varying the grip here is a good way of varying the intensity and stimulus to the forearm in different grip types. You can make it a step harder by going down to 2 fingers, but just be cautious of this step if you aren't already used to 2 finger pockets.

    The benefits of training Power Endurance on a campus board is that the exercise is so basic that it's impossible to fall of due to a technical error meaning you can push right to the physical limitations of your body. This however has the down-side that it's very repetitive and could lead to repetitive strain injury if overused.

  • Finding the balance for you...

    If you have a low level of power endurance, you may find that you struggle to climb longer more sustained sections of climbing without adequate rest.

    • Competition climbers and Sport Climbers tend to have really good power endurance as it is a requirement in their climbing to go for longer with less rest.
    • Boulderers may have a level of power endurance suitable for longer problems but if you tend to focus on short boulders of no more than 8 moves, it is unlikely.
    • Focussed Trad climbers will be more unbalanced if they don't actively train power endurance as it's unlikely they will reach an intensity on the wall that often to train this effectively.

    Is training Power Endurance important for each type of climber? The answer is yes, but in varying degrees. The competition and sport climber relies heavily on it and should therefore incorporate it as a key feature to any training plan. The Boulderer should almost certainly incorporate a boulder specific power endurance element to their plan, as it is quite often the case that Boulderers fail due to powering out at the top of longer problems. Focussed Trad climbers won't utilise this energy system as regularly as sport climbers, boulderers or competition climbers, but they will use it on climbs closer to their limits and on hard onsighting! It could be the make or break on a hard trad route whether or not they can sustain a longer section of tough climbing!


    All film and photo credits to Finalcrux Films

    To follow Robbie on his climbing adventures visit his website or follow him on Facebook

Episode 5 -  The art of resting

This might sound totally ridiculous to some, but the art of being able to rest was a massive game changer in my climbing! I'm not talking about "Resting" between attempts or the number of hours between sessions; I'm talking about being able to control your breathing, relax your grip and recover mid climb to have a better chance of getting to the top!A number of years ago I was climbing in Ceuse with world-renowned climbing coach, Neil Gresham. As you can imagine, getting together two climbing obsessed training maniac coaches would result in some pretty intense conversations. For me though what was the most interesting of the points brought up was that we both noticed how few intermediate to advance level climbers were able to effectively recover on a climb.

Most put it down to not being fit enough, but what Neil and I both noticed was that it was definitely much more of a technical issue than a physical one.

So this video and article has been inspired by what I think is probably the most underappreciated areas of climbing performance.

  • Scope out the Features

    Whether your going for an onsight or working a hard project, its essential to identify what type of holds, angle of wall or features will aid in your ability to rest during the climb. Have a think about this and try to understand what they could be:


    Holds

    • Basically any jugs or large features will allow you to recover better
    • Where there are perhaps two holds next to one another could be a good resting position
    • If there are crack features, the learning to jam can be a secret weapon in resting!


    Feet

    • If there's good feet or a ledge then your hands don't need to be as good there recover


    Angle of Wall

    • If the wall angles into a corner then you can bridge to get weight off your arms for a better rest
    • If the wall is vertical or slab then leaning into the wall to get more weight over the feet is a good way to rest


    It can be hard to see from the ground when scoping out a potential onsight, but over time you will become better at identifying the key features that make for a good rest point. Whilst redpointing a route, it's a good idea to practice resting in different positions, even if it doesn't seem likely that it would be a good rest, it might surprise you!

    Just like redpointing a hard sequence, I have found practicing rest positions incredibly useful to developing muscle memory to make rests even better. It's incredible what can sometimes feel awkward and unnatural, after a few attempts the body remembers the subtlety of the position and allows you to easily relax and recover.

  • Scope out the Features

    There's more to resting then grabbing the holds and shaking out! Both your body and mind needs to synchronise to create the most effective resting positions. If you're stressed and experiencing high anxiety, you'll tense your muscles, restrict breathing and won't relax into the best position. Think of a time when you were scared – how gripped you were; how difficult it was to rest; and then suddenly you clipped a bolt or good bit of gear and you relax and realise that you weren't in an awkward position at all, it's just that your mind isn't allowing your body to do what it naturally wants to do.


    Mindset

    Whilst resting, try and shift your mindset to be more passive than aggressive. It's hard to do on a difficult climb when your pumped, stressed and in an aggressive state, but you only have to watch the likes of Ondra, Sharma and the any of the worlds best climbers to see that it works!


    Breathe

    Everybody always says "Breathe!" - but it's true. Breathing slower deeper breathes will relax your body in a rest position and help bring you back into a much calmer frame of mind whilst simultaneously relaxing your tightened muscles.


    Relax your Grip

    Learn to relax your grip on holds – only holding on with the minimum amount of force to maintain contact and avoid over-gripping. This works in conjunction with having good body position, because if you're balanced you won't need to hold on as tight!

  • Resting on the Move

    Another really big game change for me was learning that I could rest whilst I was moving – I call this "The Quick Flick"! It's pretty simple really; all you do is shake and try to relax your hand/forearm as you move to the next handhold. It's not effective in every scenario obviously e.g. Dynos, but it has allowed me to get through some really tough terrain when I've been really pumped!

    I have found it most useful when I know the next handhold is bad and I'm going to have to pull hard on it – I lock off with the other arm, shake before grabbing the hold then engage!


    Kneebars

    Definitely more of a skill than anything else, the kneebar is the holy grail of resting techniques! If you can master this skill it will open doors allowing you the possibility to recover in difficult sections of the wall.

    Here are a few examples of different kneebars:


    No Hands Kneebar

    Where the kneebar is so good you can take of both your hands and recover fully – this might be using one or both knees


    Hand on Kneebar

    The kneebar is good but you need one hand to stay in balance on the wall. Often you can stay in balance using even a marginal hold that you wouldn't otherwise be able to hold without a kneebar, but you can still rest and recover here


    Knee scum

    This is where the knee is just pushing against a hold, feature or section of wall and it's the pressure thats holding you instead of the knee locking into something secure. Knee scums can be good for resting or for making difficult moves easier by alleviating weight from the hands

  • Resting + Tactics

    All of these are great techniques and thoughts to help you recover better on the wall, but there is more to it than just the knowledge of how to rest. It's important to have a good understanding of the tactics behind implementing resting techniques.

    A good example of this would be making sure to apply resting techniques before and after crux sections of a climb. Needless to say, climbing a crux is going to be harder if your pumped, so try and plan a rest before you enter. Similarly, you'll be tired after the crux, so scope out the potential for resting solutions afterwards otherwise it may be that your too pumped to climb even on easier terrain.

    I always envisage climbing as a balancing act. You're constantly trying to work between giving more effort in hard sections and relaxing in easier ones. If you think of the whole climb as a balance, then you'll constantly be trying to figure out where the best places to rest are, what sort of rests they need to be and how you move between them efficiently. These are just some of the tactics of resting and to a greater extent, the tactics of how to climb harder!

    All film and photo credits to Finalcrux Films

    To follow Robbie on his climbing adventures visit his website or follow him on Facebook

Episode 6 - The Transfer

What's the point of having all the strength and endurance from months of training indoors if you can't put it to use on the rock? This is something I have really strong views on as I have spent the last 10 years watching incredibly strong climbers not get the results they want on the rock. Climbing is as much a technical and mental activity as it is physical, and getting the right balance is how you can get the most of your physical gains!

We've all seen that ridiculously strong climber down the wall... You know; the climber who can do one-arm pull-ups all day, front levers for hours and campus all around the climbing wall. They might even have climbed really hard on rock giving the illusion that they are doing the right thing when in actual fact, they are just so strong they can get away with it sometimes.

Genetically you can only get so strong, but in theory, you can always get better at climbing through skill attribution and developing mental strength! If your clever, you can train in a way that will get you where you want to be.

  • Rock vs Plastic

    Firstly, lets take a look at the difference between rock and plastic. Most of these are generalisations, which you'll have to take into account.


    Plastic

    • Hand holds tend to be larger, more rounded and less finger intensive (less crimps – more slopers)
    • Footholds tend to be larger, stick out from the wall, much easier to place!


    Rock

    • Hand holds tend to be smaller, crimpier or pocketed, inset into the wall making it harder to pinch them
    • Footholds tend to be smaller, there are a lot more of them and tend to be inset making it harder to place and get away with bad technique!


    What this means is that training indoors isn't always directly transferable to rock. You have to approach your training with specificity in mind rather than just going for a random session.

  • How to Train Indoors for Rock!

    Every facility is different so some folk are going to have to be more experimental than others. At Edinburgh International Climbing Arena we have both featured and flat-paneled walls which allows for a variety of options:

    Featured Walls: A good tip if you have walls with in-built features is to allow features for feet only. What this does is provides as many (if not more) options for feet than real rock climbing and therefore develops a better understanding of general climbing movement. Having more choice for your feet opens the possibilities of better body positioning.

    Flat Paneled Walls: If you only have flat paneled walls, then using any holds for feet and limiting the hands will have the same effect as features for feet. Of course using any handholds for feet might be easier than features because they tend to be larger, in which case try only using smaller handholds for feet.

    What's great about this any holds for feet training technique is you can use it on both boulders and routes. It will open up so many more climbs to you without any extra effort – think about all those really hard climbs you've never dared touch? Well now they might be possible!?

  • No Thumbs!

    This is a bit of a strange one. I came up with the concept originally when I realized that climbing on rock rarely required the same levels of pinch strength as indoors and more often than not was largely crimps.

    If you don't climb with your thumbs you have to either crimp or open handholds. It totally changes the way you climb because you can't get the same support through your upper body as you did before – your climbing style changes as it challenges both technique and basic body tension a lot more!

    In a conversation with one ex-World Bouldering Champion I found out it was his secret to World Cup Success!!!

  • Getting the Mileage

    Mileage is the thing climbers don't seem to ever get enough of, but it's probably the one thing you need more than any other! Understanding how your body moves is integral to climbing well and the only way you can get an intrinsic understanding of body movement is by climbing a lot!

    Boulder Circuit Training

    Mileage should account for around 70% of your climbing time. If 7a is your onsight limit then mileage is: 6c, 6c+, 7a, 7a+, 7b

    This doesn't mean climbing harder grades is out the question, on the contrary! Projecting harder routes is amazing training for technique and is an invaluable exercise to learn truly what you are capable of. However spending all your time projecting hard routes can often stunt progression where the volume of climbing movement completed week to week becomes less. If you spend 70% of your time trying the same 30 moves then how can you expect to be able to combat different styles when you are confronted with them in the future?

    The best climbers are those with a bank of movement-based knowledge built from years of mileage training. They have a good base from which to build on and climb efficiently in most styles!

  • Get on the Rock!

    It really goes without saying; climbing is the best training for climbing! If you want to get better at climbing on rock, then do your best to get on it! Don't make excuses why you have to get stronger, or fitter, or better at hanging that size of edge before you get out on the rock...

    Just get out there, have fun and enjoy The Process!


    All film and photo credits to Finalcrux Films

    To follow Robbie on his climbing adventures visit his website or follow him on Facebook

Final Episodes